
Machine learning workstation
Prebuilt AI workstations from vendors like HP, Dell, and BOXX are excellent — but they carry significant markups.
If you are a developer, researcher, or student who wants maximum performance per dollar, building your own machine learning workstation gives you complete control over every component and can save 30-50% compared to an equivalent prebuilt system.
For a high-level overview of ready-to-use systems, check out our guide to enterprise AI development workstations.
The catch?
Compatibility traps. Machine learning builds are far more demanding than standard gaming PCs. Improperly configured PCIe lane splits can halve your GPU throughput.
An undersized power supply can cause system crashes mid-training. And choosing the wrong operating system can add days of frustrating driver debugging.
This guide walks you through the entire process — from selecting compatible hardware to running your first PyTorch training script on a fully configured Ubuntu workstation.
Selecting the Right ML Hardware
The hardware choices you make before purchasing a single component determine whether your build will be a reliable workhorse or a frustrating compromise. Start with the GPU — the most expensive and most impactful part — and build outward from there.
Motherboard and PCIe Topology
This is where most DIY machine learning builds go wrong. Consumer motherboards (even high-end Z790 or X670E boards) typically provide only one full-speed x16 PCIe slot. When you install a second GPU, both slots drop to x8, reducing bandwidth by half.
For multi-GPU builds, you need a HEDT (High-End Desktop) or workstation platform:
| Platform | PCIe Lanes | Max GPUs at Full Speed | Typical CPU |
|---|---|---|---|
| Consumer (AM5 / LGA 1700) | 24-28 | 1 | Ryzen 9, Core i9 |
| HEDT (TRX50 / W790) | 64-128 | 2-4 | Threadripper, Xeon W |
AMD Threadripper 7000 on the TRX50 platform provides 128 PCIe 5.0 lanes, supporting up to four GPUs at full x16 bandwidth — making it the DIY builder’s best friend for multi-GPU training rigs. If you only plan to use a single GPU, a consumer-class AMD Ryzen 9 or Intel Core i9 on a high-quality Z790/X670E board works perfectly. For those interested in professional configurations, Puget Systems provides excellent hardware baseline data for workstation builds.
Choosing the GPU
For a single-GPU build, the NVIDIA RTX 4090 (24 GB VRAM) remains the best performance-per-dollar option for developers. It handles fine-tuning of models up to 13B parameters at full precision, and can run 70B inference with 4-bit quantization via tools like llama.cpp or vLLM.

- 16,384 NVIDIA CUDA Cores
- Supports 4K 120Hz HDR, 8K 60Hz HDR and variable refresh rate as indicated in HDMI 2.1A
- New streaming multiprocessors: up to 2x power and power efficiency
- Fourth generation tensor cores: up to 2x AI power
- Third-generation RT cores: up to 2x ray tracing performance
For budget builds, a used NVIDIA RTX 3090 (24 GB VRAM) is a strong option — typically available for 40-50% less than a new RTX 4090 while still providing the same 24 GB of VRAM.

For multi-GPU builds, consider pairs of RTX 4090s or the newer RTX 5090 (32 GB). Note that consumer GeForce cards lack NVLink support, so multi-GPU training relies on PCIe interconnect, which is slower for large model parallelism. If your budget allows, RTX PRO 6000 Blackwell cards support NVLink for much faster GPU-to-GPU communication.
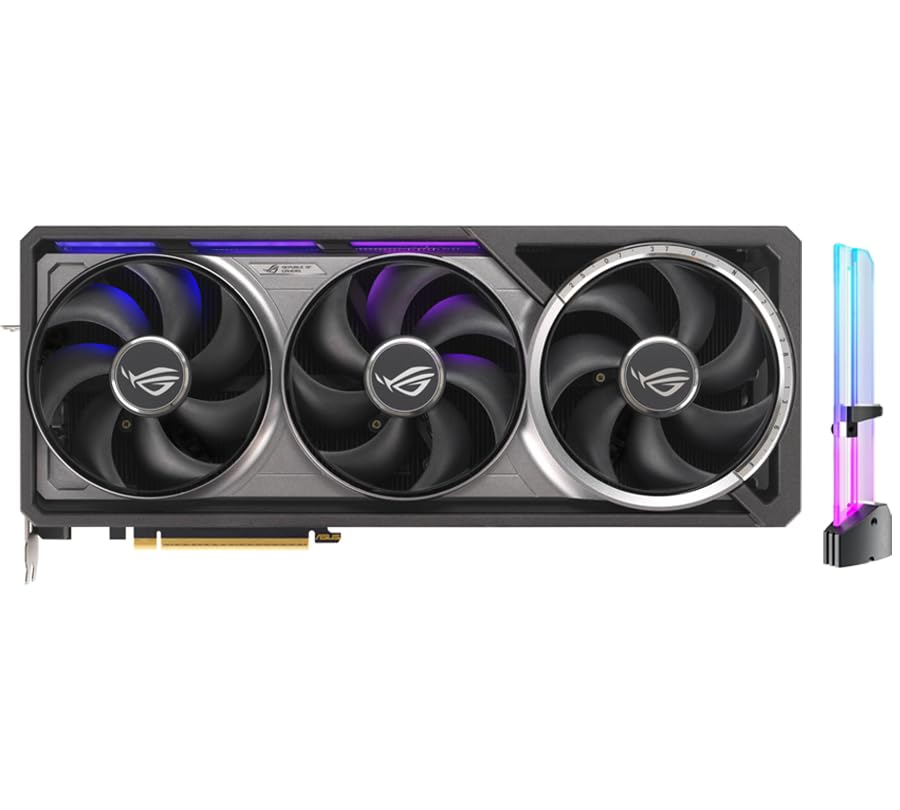
- [3352 AI TOPS, 5th Gen Tensor Cores, AI Content Creation] Built for AI-assisted photo and video workflows including upscaling, denoise, background removal, masking, and generative AI creation for faster creator productivity.
- [32GB GDDR7 VRAM, Local LLM Inference, Larger Models] Run local LLM inference and on-device AI tools with massive VRAM headroom for larger models, longer context, and heavier multitasking across AI and creator apps.
- [28 Gbps, 512-bit, 21760 CUDA Cores] High-throughput next-gen memory and core resources for demanding creator projects, complex timelines, large assets, and GPU-accelerated ML experimentation and inference pipelines.
- [Quad-Fan Force, Vapor Chamber, Phase-Change Thermal Pad] Designed for sustained performance under heavy loads with quad-fan cooling, a patented vapor chamber, and a phase-change GPU thermal pad to help lower temps and reduce hotspots.
- [DP 2.1b x3, HDMI 2.1b x2, Bundle GPU Holder] Multi-display ready with up to 4 displays and up to 7680 x 4320 max digital resolution, plus an included GPU Holder to help reduce GPU sag and improve long-term build stability.

- ATTENTION BUYERS: EXPORTING this item outside the U.S. requires strict compliance with the Bureau of Industry and Security (BIS) U.S. Export Administration Regulations (EAR). Non-compliance carries fines up to $1 MILLION PER VIOLATION AND UP TO 20 YEARS IMPRISONMENT for both the buyer and seller. To uphold our regulatory obligations, we strictly follow BIS "Know Your Customer" guidance by screening each order and immediately aborting transactions showing unresolved regulatory red flags. ***
- [Double-Flow-Through Design] The RTX PRO 6000 Blackwell features a double-flow-through cooling design, optimizing efficiency and airflow to sustain peak performance under 600W power loads. | [5th Gen Tensor Cores] Deliver up to 3X the performance of the previous generation and support for FP4 precision for faster AI model processing times with reduced memory usage, enabling local fine-tuning of LLMs and generative AI | [4th Gen Ray Tracing Cores] Double the ray-triangle intersection rate of the previous generation to create photoreal, physically accurate scenes and immersive 3D designs with RTX Mega Geometry, which enables up to 100X more ray-traced triangles.
- [PCIe Gen 5] Support for PCIe Gen 5 provides double the bandwidth of PCIe Gen 4, improving data-transfer speeds from CPU memory and unlocking faster performance for data-intensive tasks like AI, data science, and 3D modeling. | [GDDR7 Memory] With 96 GB of GPU memory and 1.8 TB ps bandwidth, it can tackle massive 3D and AI projects, fine-tune AI models locally, explore large-scale VR environments, and drive larger multi-app workflows.
- [DisplayPort 2.1] Achieve unparalleled visual clarity and performance, driving high resolution displays at up to 8K at 240 Hz and 16K at 60 Hz. Increased bandwidth enables seamless multi-monitor setups while HDR and higher color depth support ensures superior color accuracy for precision work, such as video editing, 3D design, and live broadcasting.
- [NVIDIA Blackwell Streaming Multiprocessor] The new SM features increased processing throughput, and new neural shaders that integrate neural networks inside of programmable shaders | DLSS 4: Multi Frame Generation ensures ultra-smooth frame pacing for lifelike simulations. | [Universal MIG] Divide a single RTX PRO 6000 Blackwell into multiple isolated instances, each with dedicated resources, allowing for concurrent execution of multiple workloads, optimized GPU utilization, and secure isolation of different applications or users. [WARRANTY] 3 YR Manufacturer's Warranty. Bulk OEM Packaging. Retail Packaging is NOT included.
Power and Thermals
Modern high-end GPUs have voracious power appetites. A single RTX 4090 draws up to 450W at full load. A dual-GPU build with HEDT CPU can peak at 1,200-1,400W. Follow these guidelines:
- Single GPU build: 850W-1000W PSU (80+ Gold or better)
- Dual GPU build: 1,300W-1,600W PSU (80+ Platinum or Titanium recommended)
- Triple/Quad GPU build: 1,600W-2,000W PSU — at this scale, consider a server-grade redundant PSU
For cooling, a 360mm AIO liquid cooler on the CPU provides quiet, reliable thermal management. GPU cooling is handled by each card’s own fans — ensure your case has strong front-to-back airflow. Full-tower cases like the Fractal Design Meshify 2 XL or Corsair 7000D provide the internal volume and airflow needed for multi-GPU spacing.
The Assembly Process
With your parts in hand, the assembly of a machine learning workstation largely follows the same process as any PC build, but with a few critical differences related to GPU size and power delivery.
Time Estimate: 2 – 4 hours
Difficulty Level: Intermediate to Advanced
Handling Heavy GPUs
Modern AI-class GPUs are physically massive. The RTX 4090 Founders Edition is a triple-slot, 336mm card weighing over 2 kg. Without proper support, the weight will stress the PCIe slot over time, potentially causing intermittent connection issues during long training runs.
Always use a GPU anti-sag bracket or a support bar. Many modern cases include integrated GPU support mechanisms. This is not optional for professional workloads — it is a reliability requirement.
When routing the 12VHPWR power connector (used on RTX 4090 and newer), ensure the cable has a gentle bend radius — at least 35mm. Tight bends near the connector have been associated with melting in extreme cases. Use the cable that came with your GPU or PSU, not an adapter.
Storage Configuration
Set up a tiered storage configuration for maximum training throughput:
- Primary NVMe (1-2 TB, PCIe Gen 4/5): Operating system, CUDA toolkit, Python environments, and your current project code.
- Secondary NVMe (2-4 TB, PCIe Gen 4): Active datasets, model checkpoints, and training logs. This drive absorbs the heavy read/write load during training.
- Archive (SATA SSD or NAS): Completed experiments, old datasets, and project backups.
This separation ensures your OS drive stays responsive while training saturates the secondary drive.
Setting Up the ML Software Stack
With the hardware assembled and POST-verified, the software environment is what transforms your PC into a machine learning workstation. Follow these steps in order.
Time Estimate: 1 – 2 hours
Difficulty Level: Intermediate
OS Installation: Ubuntu Linux
Download the latest Ubuntu 22.04 LTS or 24.04 LTS server or desktop ISO. Use a tool like Rufus (on Windows) or dd (on another Linux machine) to flash it to a USB drive.
During installation:
- Select the primary NVMe as the installation target
- Create a user with sudo privileges
- Enable SSH during install for remote access
After installation, update the system:
sudo apt update && sudo apt upgrade -yInstalling NVIDIA Drivers and the CUDA Toolkit
The NVIDIA CUDA Toolkit bundles the GPU driver and the CUDA libraries needed by PyTorch and TensorFlow. Install the latest version recommended by your framework:
# Add NVIDIA package repository (Ubuntu 22.04/24.04)
wget https://developer.download.nvidia.com/compute/cuda/repos/ubuntu2204/x86_64/cuda-keyring_1.1-1_all.deb
sudo dpkg -i cuda-keyring_1.1-1_all.deb
sudo apt update
sudo apt install cuda -y
After installing, reboot and verify:
nvidia-smi(Insert screenshot of nvidia-smi output here showing driver version, CUDA version, and GPU memory usage)
You should see your GPU(s) listed with driver and CUDA version information.
Troubleshooting Integration (What if?):
- What if
nvidia-smisays “command not found”? The driver installation failed or your PATH is not updated. Try runningsudo apt --fix-broken installor verify Secure Boot is disabled in your BIOS. - What if the GPU is listed, but memory is reporting error values? Wait 5 minutes and reboot again. If the issue persists, ensure that your power supply cables are securely seated and your GPU is getting sufficient PCIe power.
Environment Management: Docker, Conda, and PyTorch
Avoid installing Python packages system-wide. Use Conda (via Miniconda) or Docker containers to isolate your environments:
Conda approach:
# Install Miniconda
wget https://repo.anaconda.com/miniconda/Miniconda3-latest-Linux-x86_64.sh
bash Miniconda3-latest-Linux-x86_64.sh

# Create an environment with PyTorch
conda create -n ml python=3.11 -y
conda activate ml
pip install torch torchvision torchaudio --index-url https://download.pytorch.org/whl/cu124
Docker approach (for reproducible, shareable environments):
# Install NVIDIA Container Toolkit
sudo apt install nvidia-container-toolkit -y
sudo systemctl restart docker

# Run a PyTorch container with GPU access
docker run --gpus all -it pytorch/pytorch:latest bash
(Insert screenshot of successful Docker container launch with PyTorch executing in bash)
If both return the expected values, congratulations — your machine learning workstation is fully operational.
Benchmarking and Performance Verification
Assembling the hardware and installing the software is only 90% of the job. To ensure your build is performing at its theoretical maximum and isn’t being throttled by thermals or PCIe bottlenecks, you must run standardized benchmarks.
Measuring Training Throughput
The gold standard for AI hardware verification is the Lambdalabs PyTorch Benchmark or the MLPerf Training suite. These tests run common models (ResNet-50, BERT, GPT-2) and measure the number of tokens or images processed per second.
- Clone the benchmark repository:
git clone https://github.com/lambdal/lambda-tensorflow-benchmarks.git - Run the test: Execute the benchmark script for your specific GPU count.
- Compare results: Check your “images/sec” or “tokens/sec” against the Puget Systems benchmark database or Lambda’s public records. If your scores are 10-20% lower than expected, check your PCIe slot speed in
nvidia-smi -q.
Stress Testing for Stability
Training a model can take days of 100% GPU utilization. A “stable” gaming PC can easily crash under this sustained load. Run a stress test for at least 4 hours using GpuTest or by running a continuous loop of a heavy model like Llama-3 70B:
- Monitor temperatures:
watch -n 1 nvidia-smi - GPU targets: Stay below 85°C for the core and 100°C for VRAM (Hotspot).
- If the system reboots or the screen flickers, your PSU is likely tripping its over-current protection or your VRAM is overheating.
Advanced Maintenance: Cooling and Power
A DIY AI workstation is a high-performance machine that requires more maintenance than a standard office desktop.
Managing Multi-GPU Airflow
In a dual or triple-GPU build, the “top” card often breathes the hot exhaust of the cards below it.
- Blower vs. Open-Air: For multi-GPU builds, blower-style GPUs (which exhaust air out the back of the case) are often superior to “open-air” consumer cards, as they don’t dump heat back into the chassis.
- Fan Curves: Use
nvidia-settingsor a custom script to set an aggressive fan curve. AI developers generally prefer a loud, cool machine over a quiet, throttled one.
Power Quality and UPS
Never plug a $5,000 AI workstation directly into a wall outlet. The transient power spikes from multiple GPUs can damage sensitive components or cause data corruption during a power dip.
- UPS (Uninterruptible Power Supply): Use a Pure Sine Wave UPS rated for at least 1500VA/1000W (or higher for multi-GPU). This provides enough time to gracefully shut down your training runs during a blackout and filters “dirty” power that can cause intermittent ML errors.
Frequently Asked Questions
Is Windows WSL2 good enough for machine learning?
WSL2 has improved significantly and supports CUDA GPU passthrough. For light experimentation, it works fine. However, for serious multi-GPU training, large dataset I/O, and Docker-based workflows, native Ubuntu Linux avoids overhead and compatibility edge cases. Most professional ML engineers use Linux.
Do I need ECC (error-correcting) memory for a machine learning build?
ECC RAM corrects single-bit memory errors, which can corrupt training data or model weights during long runs. For consumer or single-user workstations, non-ECC DDR5 is generally reliable enough. For mission-critical training (medical, financial, safety-critical AI), ECC is strongly recommended — and requires a workstation-class CPU (Threadripper PRO or Xeon).
How much RAM do I need?
64 GB is the practical minimum for serious ML work. If you regularly work with datasets larger than 50 GB, run multiple experiments in parallel, or use Docker containers alongside training, 128 GB is a worthwhile upgrade. 256 GB is future-proofing for the most demanding workflows.
Can I upgrade a gaming PC into a machine learning workstation?
In many cases, yes. If your gaming PC has a recent high-end GPU (RTX 3090 or 4090), a capable CPU, and at least 32 GB of RAM, you can install Ubuntu (or use WSL2) and start developing. The main upgrade path is typically adding RAM and a secondary NVMe drive. Multi-GPU upgrades usually require a platform change.
Do I need water cooling for a machine learning build?
For the CPU, a 240-360mm AIO liquid cooler is recommended for sustained workloads. GPUs are typically cooled by their own fans. Ensure your case has strong airflow — particularly between GPUs in a multi-card setup. Full liquid cooling (custom loops) is only necessary for extreme builds or noise-sensitive environments.
What is the best budget for a single-GPU machine learning workstation?
A capable single-RTX-4090 build with a Ryzen 9 CPU, 64 GB RAM, and 2 TB NVMe storage typically costs $3,000-$4,000 for parts — roughly 30-40% less than an equivalent prebuilt system. For specialized pre-configured systems, firms like Orbital Computers offer optimized deep learning rigs.
Should I buy one expensive GPU or two cheaper ones?
For most developers, one high-VRAM GPU is easier to manage and more efficient. Multi-GPU setups add complexity (data parallelism, communication overhead) and require HEDT platforms. Start with one powerful card and add a second later if your training times warrant it.
What framework should I start with: PyTorch or TensorFlow?
PyTorch dominates in research and among independent developers due to its flexibility and Pythonic API. TensorFlow remains strong in production deployment pipelines through TF Serving. For a new workstation build, start with PyTorch — it has the largest community, the most tutorials, and the broadest model ecosystem (Hugging Face).
Can I run inference on a machine learning workstation after training?
Absolutely. A workstation that can train a model can certainly serve inference. For continuous inference endpoints, consider using tools like vLLM, Triton Inference Server, or Ollama to manage serving efficiently with GPU memory optimization.
AMD’s ROCm software stack has matured considerably, and PyTorch now provides official ROCm support. AMD Radeon PRO GPUs offer competitive VRAM at lower prices. However, NVIDIA’s CUDA ecosystem still has broader framework support, more community resources, and better tooling (TensorRT, cuDNN). For beginners, NVIDIA remains the safer choice.
Operating System Hardening for AI Development
A workstation’s performance isn’t just about hardware; it’s about eliminating “bloat” that steals CPU cycles and memory bandwidth.
Removing Telemetry and Unnecessary Services
If you are using Ubuntu, use a tool like p-rep or manual scripts to disable telemetry and background services that aren’t required for ML:
- Disable
apport,whoopsie, andsnap(if you prefer standard.debpackages for core libraries). - Stop and disable the GUI (GNOME/KDE) if you primarily use the machine as a headless server via SSH. This reclaims ~1.5 GB of VRAM that the display manager would otherwise occupy.
Kernel Performance Tuning
For high-bandwidth training:
- Enable HugePages: Large datasets benefit from larger memory page sizes, reducing the overhead of memory management.
- Set the CPU Governor to “Performance”:
sudo cpupower frequency-set -g performance. This prevents the CPU from down-clocking during idle periods between training batches, ensuring instant response when the next packet of data is ready.
Conclusion
Building a machine learning workstation is one of the best investments a developer or researcher can make. The build process follows familiar PC assembly steps, but the stakes — PCIe topology, power delivery, and GPU support — require more planning than a typical desktop.
Start with a single powerful GPU (RTX 4090 or equivalent), a reliable Ryzen 9 or Threadripper CPU, at least 64 GB of RAM, and a tiered NVMe storage setup. Install Ubuntu, configure CUDA, and set up your framework environment with Conda or Docker. For a deeper look at prebuilt options and enterprise solutions, explore our comprehensive AI development workstations guide. If you need a more portable solution, see our list of the best AI laptops for developers.
VMinstall.com is a participant in the Amazon Services LLC Associates Program, an affiliate advertising program designed to provide a means for sites to earn advertising fees by advertising and linking to Amazon.com, Amazon.co.uk, Amazon.ca, and other Amazon stores worldwide. *Best Sellers last updated on 2026-10-16 at 01:41.

